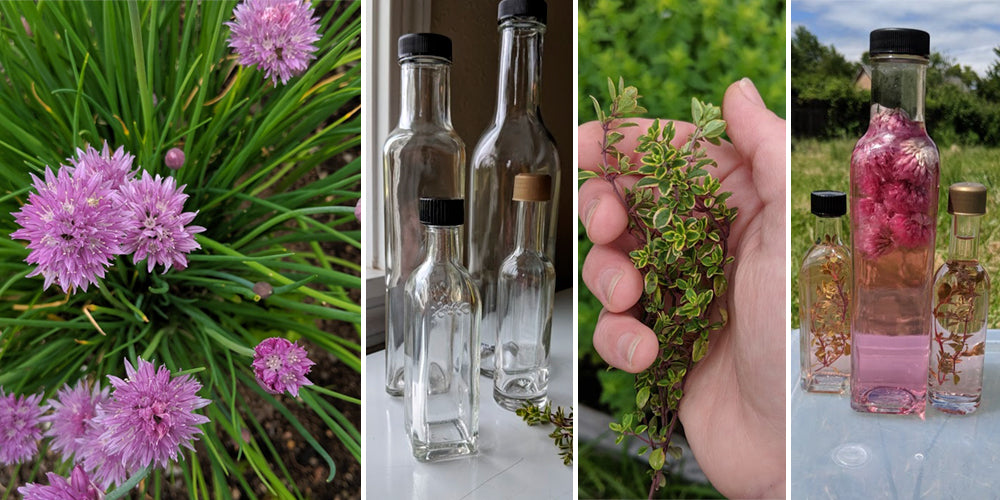
Flavored vinegars are fun and easy to make at home! They elevate salad dressings, marinades, cooked dishes, and even beverages. They also make superb gifts. If you save fun or funky bottles from other condiments, this is a great way to use them up.

My favorite variety of flavored vinegar to make is Chive Blossom Vinegar - and this is the time of the year to do it. If you’re lucky enough to have this perennial favorite in your yard, join along!
Simply snip some chive blossoms from your plant - about 3/4 - 1 cup. To wash the blossoms, I like to immerse them in water, then gently spin them in a salad spinner.
For each 16 oz bottle of vinegar, place ¾ - 1 cup of chive blossoms in the bottle. Pour vinegar over top to fill the bottle - I like white wine vinegar for this variety. Cover with a non-corrodible lid, and store in a cool, dark place for 3-4 weeks to develop flavor.
Once your vinegar has reached the desired flavor, strain the vinegar using a cheesecloth, coffee filter, or nut milk bag, until there are no signs of cloudiness. Return to the bottle and cap off. And that’s it! Flavored vinegars are best within 4-6 months. Refrigeration can extend the life of your vinegars, but these can also be stored in any dark, cool space.
Get creative with your combinations! Try strawberries or raspberries in red wine or balsamic vinegar, garlic and chili flakes in apple cider vinegar, tarragon, thyme, or basil in white wine vinegar. The possibilities are endless. Let us know what you make!
Check out the OSU Extension Publication SP 50-736 on Flavored Vinegars to learn more.

